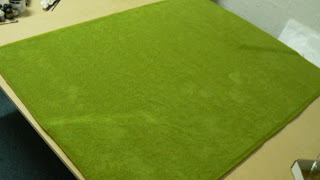
After I was semi happy with the path, which helped to break up the perfect texture of the grass mat, I also added some grass tufts to random areas in the open plain area between the hills, this also changed the texture and created a more natural open field area, once this was done I wanted to deal with the perfect colour, so I did one thing that served two purposes, I used three colours from a spray can application, Natural Brown, Yellow, and a Grassy Green and I sprayed the base of the hills, this firstly broke up the perfect green colour that was present and secondly it acts as a visual aid for the height of the hills, it kinda frames the hills and gives them more depth visually, hope that makes sense, in addition to this I also sprayed in the floor of where I wanted the forrest line to be, that's about where I am up to with this terrain piece, I would love to hear what you guys think, I will post more about it soon.
Saturday, March 24, 2012
TUSK TERRAIN PT2
After I was semi happy with the path, which helped to break up the perfect texture of the grass mat, I also added some grass tufts to random areas in the open plain area between the hills, this also changed the texture and created a more natural open field area, once this was done I wanted to deal with the perfect colour, so I did one thing that served two purposes, I used three colours from a spray can application, Natural Brown, Yellow, and a Grassy Green and I sprayed the base of the hills, this firstly broke up the perfect green colour that was present and secondly it acts as a visual aid for the height of the hills, it kinda frames the hills and gives them more depth visually, hope that makes sense, in addition to this I also sprayed in the floor of where I wanted the forrest line to be, that's about where I am up to with this terrain piece, I would love to hear what you guys think, I will post more about it soon.
Sunday, March 4, 2012
TUSK TERRAIN PT 1
I have started work on the terrain I will use for my Tusk Project, Its basically going to be an open valley surrounded with small Pine forests, plenty of open ground for Mammoths to roam freely and my hunters to do their nasty work, in the photo above you can see where I am up to, the planning and construction phase has been completed, all that is left to do now is to detail the terrain, trees, rocks, boulders and some down trodden tracks.
All I did was buy a piece of MDF wood measuring about 120cm x 90 cm which was a good size for most of the scenarios included in the Tusk rule set, from there I got my hands on some packing foam cut them into a natural hillside shape and PVA glued them down to the MDF board.
then I used a general purpose plaster crack filler and covered them over, creating gentle sloping hillsides, nothing too high, just slight height adjustments, making them as natural as possible, once the plaster dried (I left it for 24 hours) I sanded it down for an ultra smooth finish, the sanding also blended the plaster seamlessly into the MDF wood.
Once all the plaster dust was cleaned off and the terrain board was spotless, I painted it with PVA glue a section at a time, whilst at the same time I rolled on a grass mat I picked up from a local hobby shop (I think the brand was Heki), I made sure to smooth out the grass mat as I glued it down to make sure there were no kinks in it, and BANG there you have it, an instant grassy field, was pretty easy, there is still lots too do, lots of detailing (most important part of the process), thats it so far watch out for PT2 soonish.
Subscribe to:
Comments (Atom)


